Sunday, November 22, 2009

Week 17: Pumpkin Patch Cupcakes

I wanted to make something seasonally appropriate this week, so turned to Martha Stewart's Cupcakes in search of a pumpkin recipe.  Despite the ridiculous marzipan pumpkins she added, this recipe sounded perfect to me.  I'm actually disgusted by the texture and flavor of marzipan, so I skipped the toppers.  And, you know, I really didn't want to spend my entire weekend creating little pumpkins to top my cupcakes.

Here's Martha's version:


And here's my version:


Do you suppose any of my co-workers will ask where the marzipan pumpkins are?  Now that I think about it...I sort of hope they do.  I have plenty of answers to that question.

Lessons learned and recipe thoughts:

1. The cupcake batter was thicker than I was expecting.  I was very happy to have my trusty old-fashioned ice cream scoop on hand for dropping batter into each cupcake liner.

2. To save your kitchen from looking like you dropped a bag of flour on the counter, cover your mixer with a kitchen towel after each addition of flour.

3. To prevent the buttermilk from splashing out of the mixing bowl, use a spatula to lightly stir it in before turning your mixer back on.

4. I wish I had thought of 2 and 3 before my first addition of flour and first addition of buttermilk.

5. I continue to have great love for my Martha Stewart's Cupcakes cookbook.  I've now tried three recipes from this book, and have yet to be disappointed.

Martha Stewart's Pumpkin Patch cupcakes


4 cups cake flour (not self-rising), sifted
1 teaspoon baking soda
1 tablespoon plus 1 teaspoon baking powder
1 teaspoon salt
2 teaspoons ground cinnamon
1 tablespoon ground ginger
1 teaspoon freshly grated nutmeg
1/4 teaspoon ground cloves
1 cup (2 sticks) unsalted butter, room temperature
2-1/2 cups packed light-brown sugar
4 large eggs
1 cup buttermilk
1-1/2 cups canned pumpkin puree (not pie filling)

1. Preheat oven to 350. Line standard muffin tins with paper liners.  Sift together flour, baking soda, baking powder, salt, and spices.

2. With an electric mixer on medium-high speed, cream butter and brown sugar until pale and fluffy.  Add eggs, one at a time, beating until each is incorporated, scraping down sides of bowl as needed.  Reduce speed to low.  Add flour mixture in three batches, alternative with two additions of buttermilk, and beating until just combined.  Add pumpkin puree; beat until just combined.

3. Fill cupcake liners three-quarters full.  Bake, rotating tins halfway through, until golden brown, 15-18 minutes.  Transfer tins to wire racks to cool 10 minutes; turn out cupcakes onto racks and let cool completely.  Cupcakes can be stored in fridge up to 3 days in airtight containers.

4. To finish, use an offset spatula to spread frosting on cupcakes.

Martha Stewart's Cream-Cheese Frosting
Makes 4 Cups

1 cup (2 sticks) unsalted butter, room temperature
12 ounces cream cheese, room temperature
1 pound (4 cups) powdered sugar, sifted
3/4 teaspoon pure vanilla extract

Directions:

With an electric mixer on medium-high speed, beat butter and cream cheese until fluffy, 2-3 minutes.  Reduce speed to low.  Add sugar, 1/2 cup at a time, and then vanilla, and mix until smooth and combined, scraping down sides of bowl as needed.

Week 16: Old-fashioned fudge cake

My friend Jenny Vellon made this one day for our group of friends back in grad school, and we begged her to make it for every gathering after that.  Jenny is a generous and thoughtful gal, so she obliged.  She also told us it was very easy to make, but none of us believed her.

Jenny gave me the recipe for Christmas one year, and I quickly added it to my book of hand-written recipes.  And yet, I continued to worry that it'd come out terribly wrong if I attempted to make it.  It wasn't until a few months into my baking obsession that I pulled out the recipe and decided to try it out.  And boy am I glad I did - it tasted exactly as I remembered it, and it brought back great memories of fun times shared with grad school friends.

If you've always been intimidated by baking a cake from scratch, I'd say this cake is reason enough to break down and give it a go.  It's deliciously moist and, yes, surprisingly easy to make.  And how could you not want to eat this??


Honestly, look at all that chocolatey goodness!


Lessons learned and recipe thoughts:

1. A great beginner's cake - as long as you can measure ingredients and mix them with a whisk or spoon...you can handle this one.

2. After my many disastrous attempts and making chocolate peanut butter no-bake cookies & discovering that I had never allowed the mixture to come to a complete boil (see Week 7 post), I was a bit reluctant to trust that my frosting was at a boil.  Sadly, I pushed it too far & it broke.  How, you  might wonder, do you break frosting?  If you cook this frosting too long, the butter will start to separate out from the milk and cocoa & you'll have the milk and cocoa together & melted butter swimming around them.  Here's a sign that it's about to happen - you'll see dark specks & then dark streaks in the frosting as you're stirring.  And if you ignore those signs, well it'll separate.  Lucky for me, I happen to have far more baking ingredients on hand than anyone should, so I just dumped the mess in the trash can & started over.  Second attempt came out perfectly.

Many thanks to Jenny for giving me the a-ok to share this recipe with my pals.

Jenny's Old-Fashioned Fudge Cake

2 C flour
1 1/2 c sugar
1 1/2 tsp baking soda
1/4 tsp salt
1 C unsweetened cocoa powder
1 C oil
1 C buttermilk
3 eggs, beaten
3 tsp vanilla
3/4 C hot water

Frosting:
4 tbls unsweetened cocoa powder
6 tbls milk
1 stick butter
3/4 lb powdered sugar
1 tbls vanilla
 
Preheat oven to 350. Grease 9x13 pan.

1. Sift together flour, sugar, soda, salt & cocoa. Add oil, buttermilk, eggs, vanilla, and hot water. Mix well. (Seriously, that's all there is to it.)

2. Pour into 9x13 pan and bake for 30 minutes.

3. Start making your frosting about 10-15 minutes before cake is done baking.  For frosting, make a paste of cocoa and milk in a saucepan. Add butter and bring to a boil, stirring constantly.  Remove from heat and add powdered sugar and vanilla,  Beat well.  Pour over still hot cake in baking pan.

4. Serve warm; especially wonderful with vanilla ice cream or fresh whipped cream.

Sunday, November 8, 2009

Week 15: Rum Cake

I spent the weekend debating whether I felt like making & eating old-fashioned fudge cake or rum cake.  As you can see from the title, rum cake won.  Sorry, old-fashioned fudge cake & fudge cake lovers.  There's always next weekend.

I've used this recipe for years & love it.  The cake is always moist & extremely rummy.  Is that a word?  If not, it should be.

I made use of my new bundt pan that I previously tried out with my margarita cake.  But something didn't go quite right this time.  Here's how the margarita cake looked:


And here's how the rum cake looked (it pulled away from the sides of the pan & didn't come out with the same scalloped edges):


Also, (borrowing a joke from Chuck) the rum cake came out of the oven with a few pieces missing...


The glaze also came out a little funny this time around - runnier than I'm used to.  It seemed like more of it ended up on the cake plate than on the cake.


Regardless, I love this cake.  And Chuck's bandmates seemed to like it too.

Lessons learned and recipe thoughts:

1. I suspect there are two reasons the cake is misshapen: 1) I used 1/2 the amount of pudding mix it called for (because that's all I happened to have in the cupboard) and 2) the recipe is designed for a 12-cup pan & I used a 10-cup pan.

2. I might have to make this a few more times in the coming weeks to perfect this glaze.  You know, for the benefit of the people to whom I serve it.

3. I had intended to place whole pecans in the pan before pouring in the cake batter, but completely forgot.  So I might have to make this recipe again very soon.  You know, for the benefit of people who like pecans.

4. Make sure you remove your saucepan from the heat before adding rum.  Otherwise, you'll have a sputtering mess.

5. If you pour in all the rum into the glaze at once, you'll be surrounding by a cloud of rum.  That's not necessarily a bad thing...just be prepared.


Bacardi Rum Cake

1 c. chopped pecans or walnuts

1 (18 1/2 oz.) pkg. yellow cake mix
1 (3 3/4 oz.) pkg. instant vanilla pudding
4 eggs
1/2 c. cold water
1/2 c. Wesson oil
1/2 c. Bacardi dark rum (80 proof)

Preheat oven to 325 degrees. Grease and flour 10 inch tube pan or 12 cup Bundt cake pan. Sprinkle nuts over bottom of pan. Mix all ingredients together and pour over nuts. Bake 1 hour. Cool. Invert on serving plate. Prick top. Drizzle smooth glaze evenly over top and sides. Allow cake to absorb glaze. Repeat until all glaze is used.

GLAZE:

1/4 lb. butter
1/4 c. water
1 c. granulated sugar
1/2 c. Bacardi dark rum

Melt butter in saucepan. Stir in water and sugar. Boil 5 minutes, stirring constantly. Remove from heat and stir in rum.

Saturday, November 7, 2009

Week 14: Triple-layer chocolate peanut butter cake, take 2

Back in week 6 I took on my first from-scratch cake.  Brett declared it his favorite cake, and requested it for his birthday.  Being the great mom that I am, I immediately agreed.  Not because I desperately wanted to eat this cake again...no, it was for Brett.  Brett also requested that both Batman & Spiderman be represented on his cake.  Hmm...okay, then.

Final result:


Brett regularly ponders what would happen if Batman & Spiderman got into a fight.  He has decided that Spiderman would win (because he's fast).  So I carefully positioned Spiderman so it'd look like he was kicking Batman off the cake.  Because, again, I'm a great mom.


I also carefully positioned the Batmobile to cover up a frosting tragedy...the glaze was a little too warm when I poured it over the cake, and the cream cheese frosting started to melt off one section.  The brilliance of my decorating prevented anyone from knowing.

Brett was very impressed with his final cake, as were my in-laws.


Lessons learned and recipe thoughts:

1. The first time I made this, I cooked the glaze in the microwave.  While it tasted just fine, it was a little too thick for pouring and spreading.  This time, I cooked it over a make-shift double-boiler (a glass mixing bowl placed over a pan of simmering water).  It had much better spreading consistency, and also prettier drips down the side of the cake.

2. The first time I made this, I refrigerated the cake for 30 minutes in between adding the frosting and pouring on the glaze.  I wanted to see what would happen if I skipped that this time.  Answer: the frosting melted.  Next time, I'll stick with refrigerating in between the two steps.

Check out my post from week 6 for the recipes.

Wednesday, November 4, 2009

Week 13: Chocolate Buttermilk Halloween cupcakes

I have a...slight problem with sprinkles.  I tend to purchase far more than a normal person can make use of in a lifetime.  Anytime a holiday rolls around, I find new sprinkles and drop them in my cart.  Chuck's job is to remind me that I already have enough sprinkles (just like I remind him that we already have enough canned tomatoes).  Sadly, Chuck isn't always with me at the store.  All of this is a long way of explaining this:


And these are just my Halloween-themed sprinkles.  I haven't been brave enough to pull all of my sprinkles out at the same time, but I'm fairly certain I have at least twice this many Christmas-themed sprinkles.

So I figured I'd bake up some Halloween-themed treats and see what I could do about using some of my sprinkle stash.  I frosted the cupakes & then handed them off to Brett for sprinkling.  Here's what I learned: Brett preferred using one type of sprinkle on every cupcake.  After he covered 6 cupcakes with purple sugar, Chuck gently encouraged him to shift between some others.  And we ended up with a nice collection of cupcakes:


My favorite cupcake of the bunch is the one on the right corner of this pic - yeah, the one upon which Brett dumped the black sugar.  This shot was after I shook a good chunk of sugar onto other cupcakes.


Lessons learned and recipe thoughts:

1. Quick & simple recipe that makes a nice, moist cupcake.

2. I use powdered buttermilk (mixed with water) in place of fresh - you can store it far longer, and it's easier than running to the store to buy buttermilk when I'm baking.

3. Everything is better with sprinkles.

Chocolate Buttermilk Cupcakes (from The Cake Mix Doctor Returns)

Makes: 22-24 cupcakes (2 1/2 inches in diameter)
Prep: 15 minutes
Bake: 20-25 minutes
Cool: 20 minutes

24 paper liners for cupcakes pans

1 package (18.25 oz) chocolate cake mix, plain or with pudding
1/4 cup all-purpose flour
2 tbls unsweetened cocoa powder
1 1/2 cups buttermilk
1/2 cup vegetable oil
3 large eggs
2 tsp vanilla extract

1. Place a rack in the center of the oven and preheat the oven to 350.  Line 24 cupcakes caups with paper liners and set the pans aside.

2. Place all cake ingredients in a large mixing bowl and beat with an electric mixer on low speed until the ingredients are incorporated, 30 seconds.  Stop the machine and scrape down the side of the bowl with a rubber spatula.  Increase teh mixer speed to medium and beat for 1 1/2 - 2 minutes longer, scraping down the side of the bow. again if needed.  The batter should look well blended.

3. Spoon or scoop a heaping 1/4 cup of cupcake batter into each lined cupcake cup, filling it two thirds of the way full.  (You will get 22-24 cupcakes; remove the empty liners, if any.)

4. Place the pans in teh oven and bake the cupcakes until the tops spring back when lightly pressed with a finger, 20-25 minutes.  Remove the pans from the oven and place them on wire racks to cool for 5 minutes.  Run a dinner knife around the edge of the cupcake cups, lift the cupcakes up from teh bottom of the pans using the end of the knife, and pick them out of the pans carefully with your fingertips.  Place the cupcakes on a wire rack to cool for 15 minutes longer before frosting.

5. Prepare frosting of your choice (I used a basic buttercream and tinted it orange with gel paste food coloring).

6. Spoon a heaping tablespoon of frosting on top of each cupcake and swirl it with a short metal spatula or spoon to spread it out, taking care of cover the top completely.  Serve.

Tuesday, November 3, 2009

Week 12: Sour Cream Apple Pie

Every October for the past 5 years, we've made our way up to Apple Holler for some apple picking.  And every year we pick WAY more apples than we can actually eat.  This year, I decided to chop up a good portion of the apples to make a couple pies.  I can't remember where I found this recipe, but I've been baking it for years now.  And it seems like each time I bake it, someone ends up asking for the recipe.  So here it is for all to enjoy!

We had Chuck's bandmates over for dinner to help us knock out part of the pie bounty.  And the second pie made its way into the office for my coworkers.


I usually peel the apples before chopping & adding to the pie.  But I decided to leave them on this time around.  I really like the color these Jonathan peels brought to the pie, and it gave the apples a nice tangy flavor.


Lessons learned and recipe thoughts:

1. One of these days, I'm going to break down and make my own pie crust.  Til then, I'll keep picking them up from the freezer section of the grocery store.  Marie Callendar's makes a particularly nice frozen pie crust.

2. I've tried this recipe with a graham cracker crust before & it was very good...but also sweet.  If you're into sweet, go for it.

3. I've made this pie dozens of times & it always comes out perfectly.  This makes me suspect it's a relatively forgiving recipe.  It's certainly an easy one to throw together.

4. I prefer this pie warm, so I always warm up my leftover slices in the microwave.

Sour Cream Apple Pie
1 cup sour cream
1 egg
1/2 tsp vanilla
1/2 tsp salt
3/4 cup sugar
2 tbls flour
3-4 cups apples, chopped
1 unbaked 9" pie shell

Topping:
1/2 cup brown sugar
1/2 cup flour
1/4 cup butter, chilled

Preheat oven to 450

Beat egg.  Add sour cream, vanilla, and salt, mixing well.  In a separate bowl, combine sugar and flour.  Add to sour cream mixture, beating well.  Stir in apples.  Pour into shell and bake at 450 for 15 minutes.  Reduce heat to 350 and bake 30 minutes more.

Mix topping: combine flour and brown sugar, cut in butter until crumbly (if you don't have a pastry blender, you can use a fork or a pair of knives).  Sprinkle on pie and bake 10 minutes more.

Week 11: Pumpkin Pie Crumble Cake

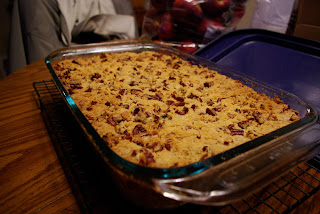
10 years ago, one of my friends brought this dessert to my baby shower.  I've been craving it every Fall since.  It's got the flavors of a yellow cake and a pumpkin pie all rolled into one, and it's especially delicious while still warm with a scoop of vanilla ice cream on top.


You end up with three basic layers in this cake - the crust, the pumpkin pie filling, and the streusal topping. YUM.


Lessons learned and recipe thoughts:

1. A wonderful alternative to pumpkin pie, particularly if you're feeding a large crowd (and/or if you don't know how to make a pie crust...).

2. Very fast, easy preparation.  Just make sure you plan ahead for the baking time.

3. I absolutely love the flavor that the pecans bring to the streusal.

4. Another easy-on-the-kitchen recipe, as the crust & filling can be mixed in the same bowl without cleaning in between.  Triple bonus points for that.

Pumpkin Pie Crumble Cake from The Cake Mix Doctor

This recipe comes from Margaret Neblett of Nashville, who got it from a friend, who got it from a friend in Chicago, and so on. Word spreads when there's a great recipe! This dessert is much like a pie in that it has a cinnamon-enhanced pumpkin filling, but much like a cake with a soft crust. And the crunchy topping is the best of both worlds. Don't be concerned that 1 cup of the cake mix is reserved for the topping. The filling bakes up firm and creamy without it.


Serves: 18 to 20
Preparation time: 15 minutes
Baking time: 70 to 75 minutes
Assembly time: 5 minutes

Solid vegetable shortening for greasing the pan
Flour for dusting the pan
1 package (18.25 ounces) plain yellow cake mix
8 tablespoons (1 stick) butter or margarine, at room temperature
4 large eggs
2 cans (15 ounces each) pumpkin
1 can (5 ounces) evaporated milk
1 1/4 cups sugar
2 teaspoons ground cinnamon
4 tablespoons (1/2 stick) butter or margarine, chilled
1 cup chopped pecans

Sweetened whipped cream for topping

Place a rack in the center of the oven and preheat the oven to 350 degrees F. Lightly grease a 13- by 9-inch baking pan with solid vegetable shortening, then dust with flour. Shake out the excess flour. Set the pan aside.

Measure out 1 cup of the cake mix and reserve for the topping. Place the remaining cake mix, the butter, and 1 egg in a large mixing bowl. Blend with an electric mixer on low speed until well combined, 1 minute. Using your fingertips, press the batter over the bottom of the prepared pan so that it reaches the sides of the pan. Set the pan aside.

For the filling, place the pumpkin, evaporated milk, 1 cup sugar, remaining 3 eggs, and cinnamon in the same large mixing bowl used to prepare the batter and with the same beaters (no need to clean either), blend on low speed until combined, 30 seconds. Increase the mixer speed to medium and beat until the mixture lightens in color and texture, 1 to 2 minutes more. Pour the filling over the crust in the pan, spreading to the sides of the pan with a rubber spatula. Set the pan aside.

For the topping, place the remaining 1/4 cup sugar, the chilled butter, and the reserved cake mix in a clean medium-size mixing bowl. Rinse and dry the beaters. Beat with an electric mixer on low speed until just combined and crumbly, 30 seconds to 1 minute. Stop the machine and stir in the pecans. Use your fingers to thoroughly knead the pecans into the topping mixture. Distribute the topping evenly over the filling mixture. Place the pan in the oven.

Bake the cake until the center no longer jiggles when you shake the pan and the pecans on top have browned, 70 to 75 minutes. Remove the pan from the oven and let cool slightly on a wire rack, 20 minutes.

Prepare two recipes of the Sweetened Cream. Slice the cake into squares and pass the Sweetened Cream to spoon on top.

* Store this cake without the Sweetened Cream on it, covered in aluminum foil or plastic wrap, in the refrigerator for up to 1 week.

RX - The Cake Doctor says...
Originally, this recipe called for margarine, but I think it benefits from the taste of butter.

Sunday, November 1, 2009

Week 10: Margarita Cake

You heard that right - a Margarita Cake!  Basically, you take all the ingredients for a margarita and you dump them in a cake.  What's not to love about that?  One of my favorite cookbook authors, Anne Byrn, recently released a new book: The Cake Mix Doctor Returns.  Her books are great for weeknight baking when time is limited, or when you just don't feel like the whole to-do of baking a cake from scratch. 

Baking geek that I am, I pre-ordered this book from Amazon and got it the day it was released.  And then I read it cover-to-cover.  You know, so I could make sure I knew what all of my options were before I chose a recipe to bake.  This recipe really jumped out at me, as I'm quite the fan of margaritas.  And as an added bonus, it gave me an excuse to try out the new bundt pan I purchased with a fancy 40% off coupon for Michael's crafts.  But I digress...on to cake.

Here it is in all its glory:


Lessons learned & recipe thoughts:

1. Extremely easy recipe & a yummy cake!

2. I used the lemon cake mix, then later wished I had used the yellow cake mix.  I forgot that there's a very slight chemical flavor to lemon cake mixes that I don't especially like.  Chuck reassured me that there was absolutely no chemical taste in my cake.  Chuck lies.  But he means well.

3. Although the garnish sounds cute & nice, I skipped it.  I did, however, use the glaze.

4. I use (and love) the vegetable oil + flour spray they sell these days. Much less mess than dusting with flour. And here's a handy tip I read recently re: spraying pans - open your dishwasher & hold the pan over the open door while you spray.  Nothing to wipe or clean that way.

5. Co-worker quote of the week: "this is the first liquor I've had since my baby was born!"  Me: "given how little alcohol is in this cake, it's a little sad that you're this excited about it."

Margarita Cake (from the Cake Mix Doctor Returns)

Ingredients: cake
Vegetable oil spray, for misting the pan
Flour, for dusting the pan
1 package (18.25 oz) plain yellow, vanilla, or lemon cake mix
Half of a package (3.4 oz) of vanilla instant pudding mix (4 tbls)
1/4 cup granulated sugar
2/3 cup water
1/2 cup vegetable oil
1/3 cup fresh lime or key lime juice
1/4 cup tequila
2 tbsl triple sec
1 tsp grated lime zest
4 large eggs

Ingredients: glaze and garnish
1 1/4 cups powdered sugar, sifted
1 tbls tequila
1 tbls triple sec
1 tbls fresh lime juice or key lime juice
1 lime, cut into thin slices
1-2 tsp coarse sugar

1. Make the cake: Place a rack in the center of the oven and preheat the oven to 350.  Lightly mist a 12-cup bundt pan with vegetable oil spray, then dust it with flour.  Shake out the excess flour and set aside.

2. Place the cake mix, pudding mix, granulated sugar, water, oil, 1/3 cup lime juice, 1/4 tequila, 2 tbls triple sec, lime zest, and eggs in a large mixing bowl.  Beat with an electric mixer on low speed until the ingredients are combined, 30 seconds.  Stop the machine and scrape down the side of the bowl with a rubber spatula.  Increase the mixer speed to medium and beat for 1 1/2 minutes longer, scraping down the side of the bowl with a rubber spatula. The batter should look smooth and thick.  Pour the batter into the prepared bundt pan, smoothing the top with the rubber spatula, and place the pan in the oven.

3. Bake the cake until the top springs back when lightly pressed with a finger, 42-47 minutes.  Transfer the pan to a wire rack and let cake cool for 10-15 minutes.  Run a long, sharp knife around the edges of the cake, shake the pan gently, and invert the cake onto a wire rack.  Let the cake cool completely, about 25 minutes longer.

4. Meanwhile, make the glaze: place powdered sugar, tequila, triple sec, and lime juice in a small bowl and whisk til smooth.

5. Slide the cake onto a serving plate.  Using a long wooden skewer, poke 12-16 holes in the top of the cake.  Spoon the glaze over the top of the cake, letting it drip down the sides.  Garnish the cake with the lime slices and a sprinkling of coarse sugar.  Let the glaze set for 10 minutes, then slice and serve.

Note: Coarse sugar is this cake's version of the coarse salt that sticks to the rim of a glass filled with a margarita.  It is often called sanding sugar and you can buy it at stores that sell cake and cookie decorating supplies.  To make sure that the sugar sticks to the cake, sprinkle it on while the glaze is still wet.

Week 7: Huzzah! Chocolate peanut butter no-bake cookies

One of my favorite cookies growing up was the simple but delicious chocolate peanut butter no-bake cookie.  My dad made these countless times for us, and it seemed like every church potluck had at least one batch on the dessert table.

And yet, I have never been able to make these without them being a total gloopy mess.  I've tried at least a dozen times over the past 20 years, each time hoping that I'd figure out the tragic flaw in my preparation...and each time, failing and ending up with runny cookies (which I still ate, of course - with a spoon).  How could I fail at a recipe that just about everyone on the planet can make?

After my successes at baking cupcakes & cakes from scratch, I thought I'd try my hand at this recipe one more time before kicking it out of my cookbook.  Reading through it, I finally realized what I had been doing wrong all these years - I didn't let it come to a full boil before starting the timer on the 1 minute boil.  D'oh!

So after 20 years of failure, I had a bright shining moment of non-baking brilliance & ended up with these delicious treats:


Words can't capture how absolutely thrilled I was with this success story.  Nor can Chuck's expression.


Lessons learned and recipe thoughts:

1. Now that I realize what I've been doing wrong all these years, I'm officially declaring this an easy recipe. :)  And easy on the kitchen as well - just a single pot & spoon to clean afterwards.

2. Part of the reason I made these was so I could tell my co-workers that I took a weekend off from baking.  You know, because they are no-bake cookies.  Co-worker quote of the week: "you have a problem."

3. If at first you don't succeed, keep doing it the same way a dozen more times.  And then read the recipe and do it the right way.

Chocolate Peanut Butter No-bake Cookies:

Ingredients:
2 cups sugar
4 tbls cocoa powder
1 stick butter
1/2 cup milk
1 cup peanut butter
1 tbls vanilla
3 cups oatmeal (I used quick-cooking)
waxed paper

Directions:
In a heavy saucepan bring to a boil (an actual full boil) the sugar, cocoa, butter, and milk.  Let boil for 1 minute then add peanut butter, vanilla, and oatmeal.  Drop mixture by spoonful onto waxed paper and cool til hardened.