Sunday, September 12, 2010

Night and Day Brownie Bites

Today I was torn between making snickerdoodle cookies or cinnamon toast cupcakes.  After finally settling on snickerdoodles, I opened the fridge and discovered I didn't have enough butter.  So I decided to go with plan b - cinnamon toast cupcakes. I opened the pantry and discovered I didn't have any yellow or white cake mixes.  So on to plan c, which previously did not exist.  I had a brownie mix in the pantry and remembered that my Cake Mix Doctor Returns cookbook has a section on brownies.  I flipped through and spotted the perfect recipe...one that combined three of my favorite things - chocolate, cream cheese, and cinnamon. Plan c!

First you fill mini cupcake pans with the brownie batter, then you top each mini brownie with a cream cheese & cinnamon mixture like so (I added some cinnamon sugar on top of that):

Pop them in the oven, then pull them out and let them cool in the pan for 10 agonizing minutes:

Then you remove them from the pan and let them cool for 5 minutes:

Ha! Who am I trying to fool - I ate one immediately:

I wanted to take a picture of it without the wrapper, but it stuck to the wrapper.  Later on, after I actually let them cool, I sacrificed and ate another one.  But just for photographic purposes:

Lessons learned and recipe thoughts:

  1. Yum!

  2. The "night" and "day" contrast would be more striking if I didn't add the optional cinnamon to the cream cheese topping. But then the brownies wouldn't be nearly as delicious.

  3. The coffee in the brownie batter just intensifies the chocolate flavor.  In other words, you'd probably never notice the coffee if I didn't just mention it.  You can certainly make it with water if you prefer.

  4. An easy recipe that is yum.  Did I mention yum?
Night and Day Brownie Bites (from The Cake Mix Doctor Returns")

For the brownie batter:
1 pkg (about 20 oz) brownie mix
1/3 cup vegetable oil
1/3 cup cooled brewed coffee
1 large egg
1 tsp pure vanilla extract

For the cream cheese batter:
8 oz cream cheese (room temperature)
1/3 cup granulated sugar
1 tbls all-purpose flour
1/4 tsp ground cinnamon (optional)
1 large egg

1. Preheat oven to 350.  Lightly mist mini cupcake pan with vegetable oil spray or line with paper liners (the recipe says it will make 24, but somehow I ended up with 40 mini brownies...terribly unfortunate).

2. Brownie batter: place brownie mix, oil, coffee or water, 1 egg, and vanilla in a large mixing bowl and stir with a wooden spoon until the ingredients are well incorporated, 40 strokes. Set bowl aside.

3. Cream cheese batter: place cream cheese in medium mixing bowl and beat with an electric mixer on low speed until fluffy, 30 seconds. Add the sugar, flour, cinnamon, and 1 egg and continue beating on low speed until well combined, 30 seconds to 1 minute.

4. Spoon a tablespoon of brownie batter into each cupcake well.  Then spoon a tablespoon of cream cheese batter over top.

5. Bake until the edges have set and the centers spring back when lightly pressed with a finger, 22-26 minutes. Remove from oven and let cool in pan 10 minutes. Run knife around edges if you baked without liners, or just lift out if you baked with liners. Let cool on wire rack 5 minutes.

Monday, September 6, 2010

Lemon Curd Icebox Cake

Brett and I were talking about his upcoming birthday.  It's not til Oct 24 - he likes to plan ahead. I wonder who he gets that from?  Anyhow, he mentioned that he'd like me to make a lemon cake for his party. Wha?! Is this the same boy who requests peanut butter-flavored anything whenever he can?  I'm really not sure what to make of this.  But I figured I oughta try out some lemon cake recipes so I can find the perfect one for the Falzone family party.

First up: Lemon Curd Icebox Cake from The Cake Mix Doctor Returns.  It doesn't get much easier than this - add 1/3 cup lemon curd to your usual ingredients for the cake mix. Yep, that's it.

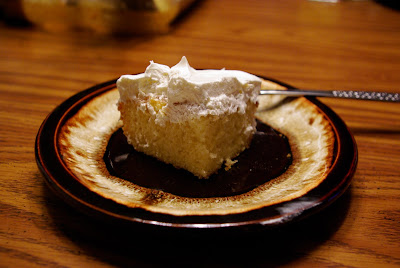
It's not too exciting to look at - just a cake covered in Cool Whip.

Cake. Covered in Cool Whip.

Lessons learned and recipe thoughts:
  1. The recipe calls for you to mix 2/3 of the lemon curd in with whipped cream.  But I wanted to separate the two to boost the lemon flavor.  So I spread the lemon curd over the cake right after I pulled it from the oven (spooning it on, then spreading it out with a spatula after it melted a touch).  I'd definitely do it this way again.
  2. I don't like lemon cake mix (I always feel like it has a weird chemical taste), and I didn't have a yellow cake mix. So I substituted a white cake mix. Worked just fine. 
  3. Chuck's review: this cake tastes like summer.  Brett's review: "mmmmm. Lemon." My review: "holy crap, that was easy to make...oh and it tastes good."
  4. Probably not the front runner for Brett's bday cake (which I've decided must have buttercream or cream cheese frosting), but great cake nonetheless.
Lemon Curd Icebox Cake

For the cake:
1 pkg (18.25 oz) plain yellow or lemon cake mix
1 1/3 cups water
1/3 cup lemon curd (from a 10 oz jar)
1/3 cup vegetable oil
3 eggs

For the topping:
10 oz cool whip (or...you can be fancy and whip 1 cup heavy cream + 1 tbls powdered sugar)
2/3 cup lemon curd (remainder of lemon curd)

1. Preheat oven to 350. Lightly grease and flour 9x13 pan.
2. Place cake mix, water, 1/3 cup lemon curd, oil, and eggs in large mixing bowl. Beat on low speed 30 seconds til incorporated. Scrape down side of bowl if needed.  Increase mixer to medium and beat 1 1/2 min til batter is thick and well combined. Pour batter into pan and place in oven.
3. Bake til cake is golden brown and springs back when lightly pressed with a finger, 30-35 minutes. Transfer to wire wrack and let cool to room temperature, 25 minutes.
4. When the cake has cooled, fold lemon curd in to Cool Whip or whipped cream. Spread over cooled cake with spatula. Cover and refrigerate to chill at least 1 hour before slicing and serving.

Sunday, August 22, 2010

S'mores cake. I mean, trifle.

This week I joined my co-workers at a Cubs game.  I'm sure it comes as absolutely no surprise that my favorite part of the game was when a dessert cart came to visit our suite.  It was loaded with deliciousness, but one treat jumped out at me immediately: a smores layer cake.  As I was digging in, I was thinking, "I bet I could make this."  And over the course of the next 10 minutes, two co-workers wandered over to tell me I should make a smores cake this weekend.  Never one to back down from a dessert request (though honestly, it felt a little more like a demand than a request), I set off to the internet and read dozens of recipes to find the perfect one. 

Once I settled on a recipe, I stopped off at the store to pick up some supplies.  And then I read dozens more recipes, and bought additional supplies. (Insert your own "boy, Katie sure has OCD" joke here.)  It's possible I bought more than necessary...


First up - mixing up a graham cracker cake & adding cocoa to half of it:


Placed those in the oven & moved on to the milk chocolate ganache, which started like this:


And then sat around for 5 minutes looking like this:


A few seconds into whisking, it looks terribly wrong:


And then with a few more spins of the whisk, it magically turned into this:


Why am I showing you so many pictures of ganache?  Because it was the most successful part of this recipe.  But more on that later...

Pulled the cakes out of the oven:


After letting them cool for 5 minutes, turned them out of their pans to cool completely - everything seems perfectly normal:


And then...disaster strikes.  I decided to split the cake layers so I could make my creation look as fancy as the dessert cart version.  And that's when I learned that the recipe I chose made an incredibly crumbly cake.  For those who have never split a cake layer, crumbly = bad.  One half of the plain graham cracker layer split in three pieces.  And then pieces of the chocolate layer started to fall off.  I sighed a few times.

Plan A: leave the split layers together as if I had never cut them in half.  Spread marshmallow fluff over top.  Fail.

Plan B: remove the top half of each layer and try to make a cake with the remaining half. Fail.

Plan C: ditch all hope of making a beautiful, fancy layer cake and dump everything into a bowl instead. Fail?  No. Success!  You know why? Milk chocolate ganache.  It makes all things perfect and wonderful.


Lessons learned and recipe thoughts:

1. I'm not even going to bother typing up this cake recipe.  No one should use it.  Ever.
2. Despite multiple disasters, Brett declared the cake "yummy!"
3. Smores trifle sounds ever so much nicer than, "yeah, the cake was all messed up, so I dumped everything in a bowl. Just eat it."

Sunday, August 15, 2010

Yellow cake with butterscotch and chocolate ganache

We had a pal over for dinner last night, and Chuck mentioned that he's been wanting to try a recipe for homemade butterscotch from one of his favorite books - Ratio: The Simple Codes Behind the Craft of Everyday Cooking.  I suggested we also make some chocolate sauce, so he thumbed through the book and found a recipe of chocolate ganache that can be used as a sauce when warm.  We picked up some vanilla ice cream, and were set.

Delicious!  But we barely made a dent in the nearly 4 cups worth of dessert sauce.  So then came the question...what on earth are we going to do with all this sauce?  Naturally, I immediately thought of how I could incorporate them into a cake.  And here's what I came up with - yellow cake topped with butterscotch and ganache.

Butterscotch slowly soaking in

Covered with ganache - I like to leave half without nuts for those who hate them :)

The butterscotch soaked in perfectly

I couldn't wait for the ganache to set - I dug right in. A lovely, rich cake.

Lessons learned and recipe thoughts:
  1. Ganache sounds fancy, but it is one of the easiest things I've ever made.  I'm pretty sad that it took me this long to discover it was so simple.  I might have to come up with an excuse to make it weekly.
  2. Store-bought butterscotch and homemade butterscotch are two entirely different beasts.  Good lord - the flavor was just amazing.  Another simple recipe that I will definitely be making again.
  3. It is a really good idea to make either of the above.  It's probably not a good idea to make them together.  Unless, of course, you have an office full of people to feed them to.
Here's how I pulled this cake together: I baked a yellow cake and let it cool for 10 minutes.  Then I poked holes all over the cake with a fork.  I spooned the butterscotch over the cake and let it soak in.  Once the cake cooled, I microwaved the ganache to soften it a bit, then poured it over the cake.  Simple!

Basic Ganache:

8 oz cream
8 oz bittersweet or semisweet chocolate, coarsely chopped

Bring the cream just to a simmer, pour it over the chocolate, wait 5 minutes for the chocolate to soften, then whisk the cream and chocolate until they're completely combined.  Serve immediately or chill until you're ready to serve. [Can be used as an ice cream sauce, chilled and rolled into truffles dusted with cocoa powder, or as a fudgelike icing on cake or brownies.]

Old-Fashioned Butterscotch Sauce

4 oz unsalted butter (1 stick)
8 oz dark brown sugar
8 oz cream
1 tsp vanilla extract
2 tsp apple cider vinegar
1/2 tsp salt, or to taste

In a heavy-bottomed saucepan or an enameled cast-iron pot, combine the butter and sugar over medium heat and cook until the sugar has melted completely and the mixture has taken on a thick and frothy lava-like appearance, 5-10 minutes.  Turn off the heat.  Whisk in the cream until it's thoroughly incorporated.  Let it cool for 10 minutes, then add the remaining ingredients.  Taste and adjust the seasoning.

Sunday, August 8, 2010

Fluffernutter Brownies

One of my favorite treats when I was a kid was fluffernutter sandwiches.  I had a jar of marshmallow fluff in my baking pantry & was inspired to try to recreate fluffernutters in brownie form. 

I started with a brownie mix, to which I added a cup of chocolate chips and a cup of peanut butter chips

Fresh out of the oven, I poured a bag of peanut butter chips over top

I let that sit for a few minutes, then spread the peanut butter chips with a spatula

I nuked a jar of marshmallow fluff for 20 seconds to soften it, then spread it on top the peanut butter

I was thinking our butane torch would be perfect for toasting the fluff. Chuck suggested I use the broiler instead.  And that's how I learned that marshmallow fluff is extremely flammable. That's right, the fluff actually caught on fire. It was pretty awesome.

I scraped off the burnt layer of fluff (it was actually yummy - tasted like a campfire) and then used my torch

Brett declared the fluffernutter brownies, "So yummy!"

Lessons learned and recipe thoughts:

1. Marshmallow fluff + broiler = raging fire.
2. Brownie mixes are supremely delicious when you replace the oil with a stick of melted butter. Even better when you add chocolate chips & a splash of vanilla to the batter.

Fluffernutter Brownies

Family size brownie mix (19.8 oz)
8 tbls (1 stick) unsalted butter, melted
1/3 cup water
2 large eggs
1 tsp vanilla
1 cup chocolate chips
3 cups peanut butter chips (1 1/2 bags)
1 jar marshmallow fluff

1. Preheat oven to 350. Grease and flour 9x13 pan
2. Place brownie mix, melted butter, water, eggs, and vanilla in a large mixing bowl. Stir with a wooden spoon until all the ingredients are incorporated and the batter lightens in texture, 50 strokes. Stir in chocolate chips and 1 cup peanut butter chips. Pour into the prepared pan, smoothing it out with a spatula.
3. Baking brownies until the outer 2 inches have formed a crust and feel firm, 23-27 minutes. Remove from oven and place on cooling rack.
4. Immediately pour 2 cups peanut butter chips over brownies. Let set 2-3 minutes til chips soften. Spread over brownies with spatula.
5. Microwave marshmallow fluff 20 seconds to soften. Spread with spatula over peanut butter layer.
6. Place back in oven to brown, watching closely; or use a butane torch to brown the fluff.

Sunday, August 1, 2010

Pina Colada Cake

A couple months back, Amazon.com suggested a book I might like: Booze Cakes: Confections Spiked with Spirits, Wine, and Beer. Amazon knows me well.  I'm fully expecting Amazon to start suggesting I'd like cases of vodka.  Anywho...

Brett Jr. headed off to a YMCA sleep-away camp this morning, so I figured this was the perfect time to make the pina colada cake I spotted when the book first arrived.  What I failed to realize was I didn't have enough flour to make the cake.  I didn't feel like driving four blocks to the grocery store, so I moved on to plan B - finding a recipe that used a cake mix as the base.

I searched the internet and found a few recipes that looked promising, and then I pulled out a stack of my baking cookbooks to see if there were any other worthy candidates.  Lo and behold, I discovered The America's Test Kitchen Family Baking Book had a section of recipes that start with mixes...and one of those recipes was for pina colada cake. Huzzah!

Toasted coconut fresh from the oven

Problem: I bought too much cream of coconut. Solution: make pina coladas

After downing a pina colada, I frosted the cake and covered it with crushed pineapple & coconut 

I declare this cake yum


Lessons learned and recipe thoughts:

1. I usually follow baking recipes exactly the first time I make them.  But recipes made with cake mixes tend to be pretty forgiving.  So I made a few modifications: I substituted coconut rum for the dark rum, and a white cake mix for yellow (only because I discovered I was also out of yellow cake mix...seriously, what's going on with my baking pantry?!).  And since I was too lazy to drive to the store for flour, it probably comes as no surprise that I was also too lazy to drive to the store for fresh pineapple or sliced canned pineapple.  I had cans of crushed pineapple, and figured those would work just as well.

2. I didn't feel like making a layer cake, so I used a 9x13 pan and increased the baking time to 40 minutes.  I also toasted an extra 1/2 cup of coconut so I'd have enough to cover it.  This cake batter was very thick, which resulted in a rather dense cake.  I think it would have come out a little lighter had I baked it in the 9 inch pans the recipe called for.  Regardless, it was good. :)

Pina Colada Layer Cake

7 oz sweetened shredded coconut (toast for 6-8 minutes, stirring regularly)
1 (18.25 oz) box yellow cake mix
1 (15 oz) can cream of coconut (like Coco Lopez; NOT coconut milk)
1/4 cup dark rum
3 large eggs
8 oz cream cheese, softened
6 tbls (3/4 stick) unsalted butter, softened
1 cup powdered sugar
1/2 pound peeled and cored fresh pineapple, sliced into 1/4 inch rings (can substitute one 20 oz can of sliced pineapples, drained and patted dry)

1. Preheat oven to 350.  Toast coconut in a rimmed cookie sheet for 6-8 minutes, stirring regularly, until golden brown.  Grease and flour two 9 inch cake pans, then line the bottoms with parchment paper. Measure and reserve 1/2 cup of the toasted coconut for garnishing.

2. Process the remaining coconut in a food processor until very finely ground, about 15 seconds.  Transfer the processed coconut to a large bowl and sift the cake mix over the top (note: I just placed the cake mix in the bowl first and whisked it a bit to break up lumps). Whisk in 1 1/4 cups of the cream of coconut, rum, and eggs until incorporated.  Give the batter a final stir with a rubber spatula to make sure it is thoroughly combined.

3. Scrape the batter into the prepared pans and smooth the tops.  Bake the cakes until a toothpick inserted in the center comes out with a few crumbs attached, about 20 minutes, rotating pans halfway through baking.

4. Let the cakes cool in the pans for 10 minutes. Run a small knife around the edge of the cakes then flip them out onto a wire rack. Peel off the parchment paper, flip the cakes upright, and let cool completely, 1-2 hours.

5. Meanwhile, mix the remaining cream of coconut, cream cheese, butter, and powdered sugar in a medium bowl until smooth.  Refrigerate until reach to use.

6. Place one cake layer on a platter, spread half the cream cheese frosting over the cake, leaving 1/4 inch border at the edge.

7. Place the second cake layer on top and press lightly to adhere.  Spread the remaining frosting over the top (leaving the sides of the cake bare). Arrange the pineapple rings attractively over the top of the cake, then sprinkle with the reserved toasted coconut.

Sunday, July 25, 2010

Year 2 begins: Chocolate Peanut Butter Marble Cake

My pals at work and those who follow my blog probably know that chocolate and peanut butter are a regular theme.  It's my favorite combo, as well as Brett Jr's favorite.  Today's project combines them simply and beautifully.  Just look at how pretty this cake is!

On its way into the oven

Fresh out of the oven

Frosted and covered with mini Reese's peanut butter cups

Right before we devoured it

Lessons learned and recipe thoughts:

1. Brett Jr's review: "Is it my birthday? I love this cake!"

2. Taken from one of my favorite baking cookbooks (The Cake Mix Doctor Returns), this is one easy cake.

3. While it may feel intimidating to make a stove-top frosting, this is a really, really easy frosting.  If you can melt butter and stir, you can make it!  And it is seriously delicious - would be great on pretty much anything (including a spoon; not that I ate it with a spoon...really, I didn't).

Chocolate Peanut Butter Marble Cake

1 package (18.25 oz) plain yellow or vanilla cake mix
1/3 cup smooth peanut butter
1/2 cup vegetable oil
3 large eggs
1 tsp vanilla
1 1/3 cups water
1/4 cup unsweetened cocoa powder
2 tbls powdered sugar
2 tbls butter, melted
2 tbls warm water

1. Place a rack in the center of the oven and preheat to 350. Lightly mist a 13x9 pan with cooking spray and dust with flour. Shake out excess flour.

2. Place the cake mix, peanut butter, oil, eggs, vanilla, and 1 1/3 cups water in large mixing bowl and beat with an electric mixer on low speed til blended, 30 seconds. Stop the machine and scrape down the bowl with a rubber spatula. Increase mixer speed to medium and beat for 2 minutes longer, scraping down the side of the bowl again if needed.  The batter should be well blended.

3. Measure out 1 1/2 cups of the cake batter and place it in a medium-sized bowl (note: I measured and left it in a 4-cup pyrex measuring cup that had plenty of room for the remaining ingredients). Set the bowl aside. Pour the remaining batter into the prepared cake pan, smoothing the top with the rubber spatula.

4. Make the chocolate marble by stirring the cocoa powder, powdered sugar, butter, and 2 tbls warm water into the reserved 1 1/2 cups of cake batter until well combined.  Spoon tablespoon-size dollops of this mixture on top of the peanut butter batter. Swirl with a knife to marble the cake, but be careful not to touch the bottom of the pan. Place the pan in the oven.

5. Bake til the top springs back when lightly pressed with a finger, 30-35 minutes. Transfer the cake pan to a wire rack and let the cake cool while you make the Chocolate Pan Frosting (10-15 minutes).

6. Pour the warm frosting over the cake, spreading it with a spatula so it reaches the edges of the cake. Work quickly because the frosting goes on best while still warm. Let set for 15 minutes, then slice and serve the cake.

Chocolate Pan Frosting

8 tbls butter (1 stick)
4 tbls unsweetened cocoa powder
1/3 cup milk
 3-3 1/2 cups powdered sugar, sifted

1. Melt the butter in a medium-sized saucepan over low heat, 2-3 minutes. Stir in the cocoa powder and milk. Cook, stirring, until the mixture thickens and just begins to come to a boil, 1 minute longer. Remove the pan from the heat. Stir in 3 cups powdered sugar, adding more if needed, until the frosting is thickened and smooth and the consistency of hot fudge sauce.

2. Ladle the warm frosting over top of the cake, then spread to the sides. Frosting will harden as it cools.

Weeks 36-52: Wow, really?

Holy smokes, I am so far behind on my blog that I've forgotten many of the things I've made.  Sorry, pals.  I'm still baking every weekend, and have made a variety of brownies, cakes, and other treats the last few months.  I can't believe it's been a year since I started my weekly baking habit. Time sure flies when you're eating sweets.

Here are a few pics of random treats from the past few months:

Cherry Blueberry Crisp


Bourbon Brownies with Chocolate Bourbon Frosting

Dark Chocolate Brownies with Chevre

And here are recipes I've promised to type up for a group of folks:

Sex in a Pan

Crust:
1 stick butter (melted)
1/4 cup sugar
2 cups graham cracker crumbs

Filling/topping:
8 oz cream cheese (room temperature)
1 cup powdered sugar
12 oz Cool Whip
small box chocolate instant pudding
small box vanilla instant pudding
3 cups milk
Optional - unsweetened cocoa powder and/or cinnamon
Combine crust ingredients and press into 9x13 pan. Bake at 350 for 8 minutes. Cool completely.

Blend cream cheese and powdered sugar til smooth (1-2 minutes with hand mixer). Stir in 4 oz Cool Whip. Spread over cooled crust. Mix puddings and milk, beat 2 minutes with hand mixer. Pour over cream cheese mixture. Top with 8 oz Cool Whip. Optional - sprinkle cinnamon and/or cocoa powder over top. Refrigerate until ready to serve.

Variations:
1. Add a layer of sliced strawberries between cream cheese and pudding layers.
2. Swap out chocolate pudding for other flavors (e.g. butterscotch, banana, pistachio)


Cherry dump cake

1 can (20 oz) crushed pineapple, undrained
1 can (21 oz) cherry pie filling (can substitute peach, apple, or whatever else you like)
1 package (18.25 oz) plain yellow cake mix
12 tbls (1 1/2 sticks) butter, melted
1/2 cup grated coconut
1 cup chopped pecans

1. Place rack in the center of the oven and preheat to 350.

2. Spoon the pineapple evenly over the bottom of a 9x13 pan. Cover the pineapple with pie filling. Pour the dry cake mix evenly over the fruit mixture so that it reaches all the sides of the pan. Drizzle the entire pan with the melted butter. Sprinkle the coconut and pecans over the top of the cake. Place the pan in the oven.

3. Bake the cake til it is deep brown and a toothpick inserted into the center of the cake topping comes out clean, 55-60 minutes. Remove the pan from the oven and place it on a wire rack to cool for 10 minutes.

Aztec brownies

12 oz semisweet chocolate chips
1 cup (2 sticks) butter, softened
1 cup sugar
3 eggs
1 tbls instant espresso powder
1 tbls vanilla
3/4 cups all-purpose flour
2 tsp baking powder
1 tsp ground cinnamon
1-2 tsp chili powder
1/2 tsp salt
3/4 cup sliced almonds

1. Preheat oven to 350. Spray 13x9 pan with cooking spray. Linea pan with foil and spray foil (I skipped this step).

2. Place chocolate chips and butter in medium microwaveable bowl; microwave on high 30 seconds.  Stir until mixture is smooth. (If lumpy, microwave 10 seconds and stir again.

3. Whisk eggs, espresso powder, and vanilla in medium bowl til well blended.  Stir in warm chocolate mixture; set aside to cool 10 minutes. Whisk flour, baking powder, cinnamon, chili powder, and salt in large bowl; stir in chocolate mixture until well blended. Pour into prepared pan.

4. Bake 15 minutes; remove pan from oven and sprinkle with almonds. Bake 20 minutes longer or until top is no longer shiny and toothpick inserted into center comes out almost clean. (Do not overbake.) Cool completely in pan on wire rack before cutting into squares or triangles.

Key lime pie
Filling:
4 large egg yolks
4 tsp grated fresh lime zest
1 (14 oz) can sweetened condensed milk
1/2 cup fresh lime juice (4-5 regular limes or 20 key limes)

Timing is important for this recipe; make the filling first, then the crust.

Graham cracker crust
1 1/2 cups graham cracker crumbs
1/3 cup sugar
6 tbls melted butter

Mix all ingredients and press into a 9 inch pie plate. Bake for 6-8 minutes at 325.

1. For the filling: Whisk egg yolks and zest together in a medium bowl until the mixture has a light green tint, about 2 minutes. Whisk in the condensed milk until smooth, then whisk in the lime juice. Cover the mixture and set aside at room temperature until thickened, about 30 minutes.

2. Meanwhile, prepare and bake the crust. Transfer the pie plate to a wire rack and leave the oven at 325. (The crust must still be warm when the filling is added).

3. Pour the thickened filling into the warm pie crust. Bake the pie until the center is firm but jiggles slightly when shaken, 15-20 minutes. Let the pie cool slightly on a wire rack, about 1 hour, then cover loosely with plastic wrap and refrigerate until the filling is chilled and set, about 3 hours.

Sunday, March 21, 2010

Week 35: Oreos!

A couple years back, one of my cowkrers told me about a homemade Oreo recipe that was delicious.  She passed it along, but I never got around to making it.  Reading through my Martha Stewart's Cookies cookbook, I discovered she had a recipe for homemeade Oreos as well (though she calls them "Cream-Filled Sandwich Cookies).  I call them yum.  I planned ahead and made a double batch so I'd actually have some to take to work tomorrow.

Check out this crackly goodness:


And even better, with cream filling!


And better yet...a table full of cookies!


The first batch I put in the oven were HUGE.  I decided that no one would eat them if I created sandwich cookies out of them.  Well, I would eat them.  But I suspect quite a few of my coworkers would shy away from eating a giant cookie sandwich.  So instead, I made some open-faced Oreos. Mmmm.


Lessons learned and recipe thoughts:

1. Do not substitute a 2" ice cream scoop for the 1 1/4" the recipe calls for.  Unless, of course, you want giant cookies.  If so, carry on.

2. Oreos are great.  But homemade Oreos are amazing.

3. I know I sound like a broken record, but this recipe is EASY.

Martha Stewart's Cream-Filled Chocolate Sandwiches

Ingredients

Makes about 30.

1 1/4 cups all-purpose flour
3/4 cup Dutch-process cocoa powder
1 teaspoon baking soda
1/4 teaspoon baking powder
1 1/2 cups sugar, plus more for flattening cookies
10 tablespoons (1 1/4 sticks) unsalted butter, room temperature
1 large egg, room temperature

Directions


1.Preheat oven to 375 degrees. Into a medium-size bowl, sift together flour, cocoa powder, baking soda, baking powder, and salt; set aside.

2.In the bowl of an electric mixer fitted with the paddle attachment, cream sugar and butter until light and fluffy, about 2 minutes. Add egg; beat to combine. With mixer on low speed, gradually add the flour mixture; continue beating until dough is well combined.

3.Using a 1 1/4-inch ice cream scoop, drop dough onto parchment-lined baking sheets about 2 inches apart. Dip bottom of a glass in sugar; press to flatten cookies to about 1/8 inch thick. (You may need to carefully remove dough from glass with a thin metal spatula.)

4.Transfer to oven, and bake until cookies are firm, about 10 to 12 minutes, rotating baking sheets halfway through. Transfer baking sheets to wire racks to cool completely.

5.Place cream filling in a pastry bag fitted with a coupler, and pipe about 1 tablespoon filling onto the flat side of half the cookies. Place remaining cookies on top, and gently press on each to squeeze filling to edges. Filled cookies can be stored in airtight containers at room temperature up to 2 days.  
 
 
Vanilla Cream Filling

Ingredients


Makes about 1 cup <--- I did the math, and it's impossible for this recipe to only make 1 cup.  I made just a single batch of the filling to go with my double batch of cookies, and it was plenty.

1/2 cup (1 stick) unsalted butter, room temperature
1/2 cup solid vegetable shortening
3 1/2 cups confectioners' sugar
1 tablespoon pure vanilla extract

Directions


1.In the bowl of an electric mixer fitted with the paddle attachment, cream butter and shortening until well combined. With mixer on low speed, gradually add the confectioners' sugar, and continue beating until light and fluffy, about 2 minutes. Add the vanilla, and beat to combine. Set aside at room temperature until ready to use.

Weeks 30-34: Lots of baking, not much typing

I knew I was behind on my blog, and coudln't quite remember what or when my last post was.  I laughed out loud (yes, lol) when I realized that my last post was the chocolate hazelnut disaster zone cake.  Not to worry, that disaster didn't prevent me from baking the next weekend.  Or any weekend since.  So here's what you've missed:

Week 30: Mardi Gras cupakes (yellow pound cake cupcakes with a simple glaze & SPRINKLES!)


Week 31: Ginger cheesecake bars (silly easy recipe, and a great one for ginger fans - check it out at http://www.marthastewart.com/recipe/ginger-cheesecake-bars)


Week 32: Chocolate Rum icebox cake (oh my lord...so delicious & pretty! And I redeemed my whipped-cream-based filling disaster from hazelnut week!  Surprisingly easy to make.)


Week 33: Cinnamon streusal cake (holy crap, this might be one of my favorite cakes ever. EVER! It's basically a yellow cake with cinnamon streusal on top each layer and a generous coat of cream cheese frosting. YUM. I know I keep saying this, but this really was an easy recipe. Here's a pic of what was left after the Falzone clan dug in at my father-in-law's birthday party. This hunk made it's way into the office.)


Week 34: Smores bars (I was feeling tired & lazy, and didn't want to make anything that required effort. Huzzah, this was perfect!  Very few things are easier than this. Seriously...make a double recipe graham cracker crust & press on bottom of pan, then add a cup of chocolate chips & a cup of chopped nuts, pour a can of sweetened condensed milk over that, and then bake for 25 minutes at 350. Drop marshmallows on top & bake for another 2 minutes or til browned. I told you it was easy!)


Lessons learned and recipe thoughts:

1. I've typed too much.  All of the above = yum.

If you want any of the recipes, let me know!